Best Cameras for Astrophotography of 2026

The first time you point a camera at the night sky, the sky fights back. Stars come out as smeared dots, a nebula turns into a faint grey smudge, and the hobby starts to feel like a software problem you didn't sign up for. What separates a frustrating first night from a good image usually isn't the sensor — it's whether the thing tracks the sky, focuses itself, and stacks frames while you're asleep.

My team and I have spent eight months with 12 cameras and smart scopes — app-controlled models you aim with a phone, bodies that slot into a telescope you already own, and tiny eyepiece cameras that cost less than a nice dinner. We shot from a light-polluted balcony, a dark-sky campsite, and a friend's first-ever session, and the word "camera" turned out to hide two very different purchases.

The picks below favor image quality and value — with a genuinely easy first option for beginners and plenty for someone who already owns glass — because those are the two things our testers kept circling back to.

1

Best Overall

Seestar S30 Pro

85 /100
LBD Score Excellent

Key details

Mount
Alt-azimuth, EQ mode
Imaging
Dual 4K cameras
Field Of View
4.6 degrees
Aperture / Focal Length
30mm / 160mm
View on Amazon

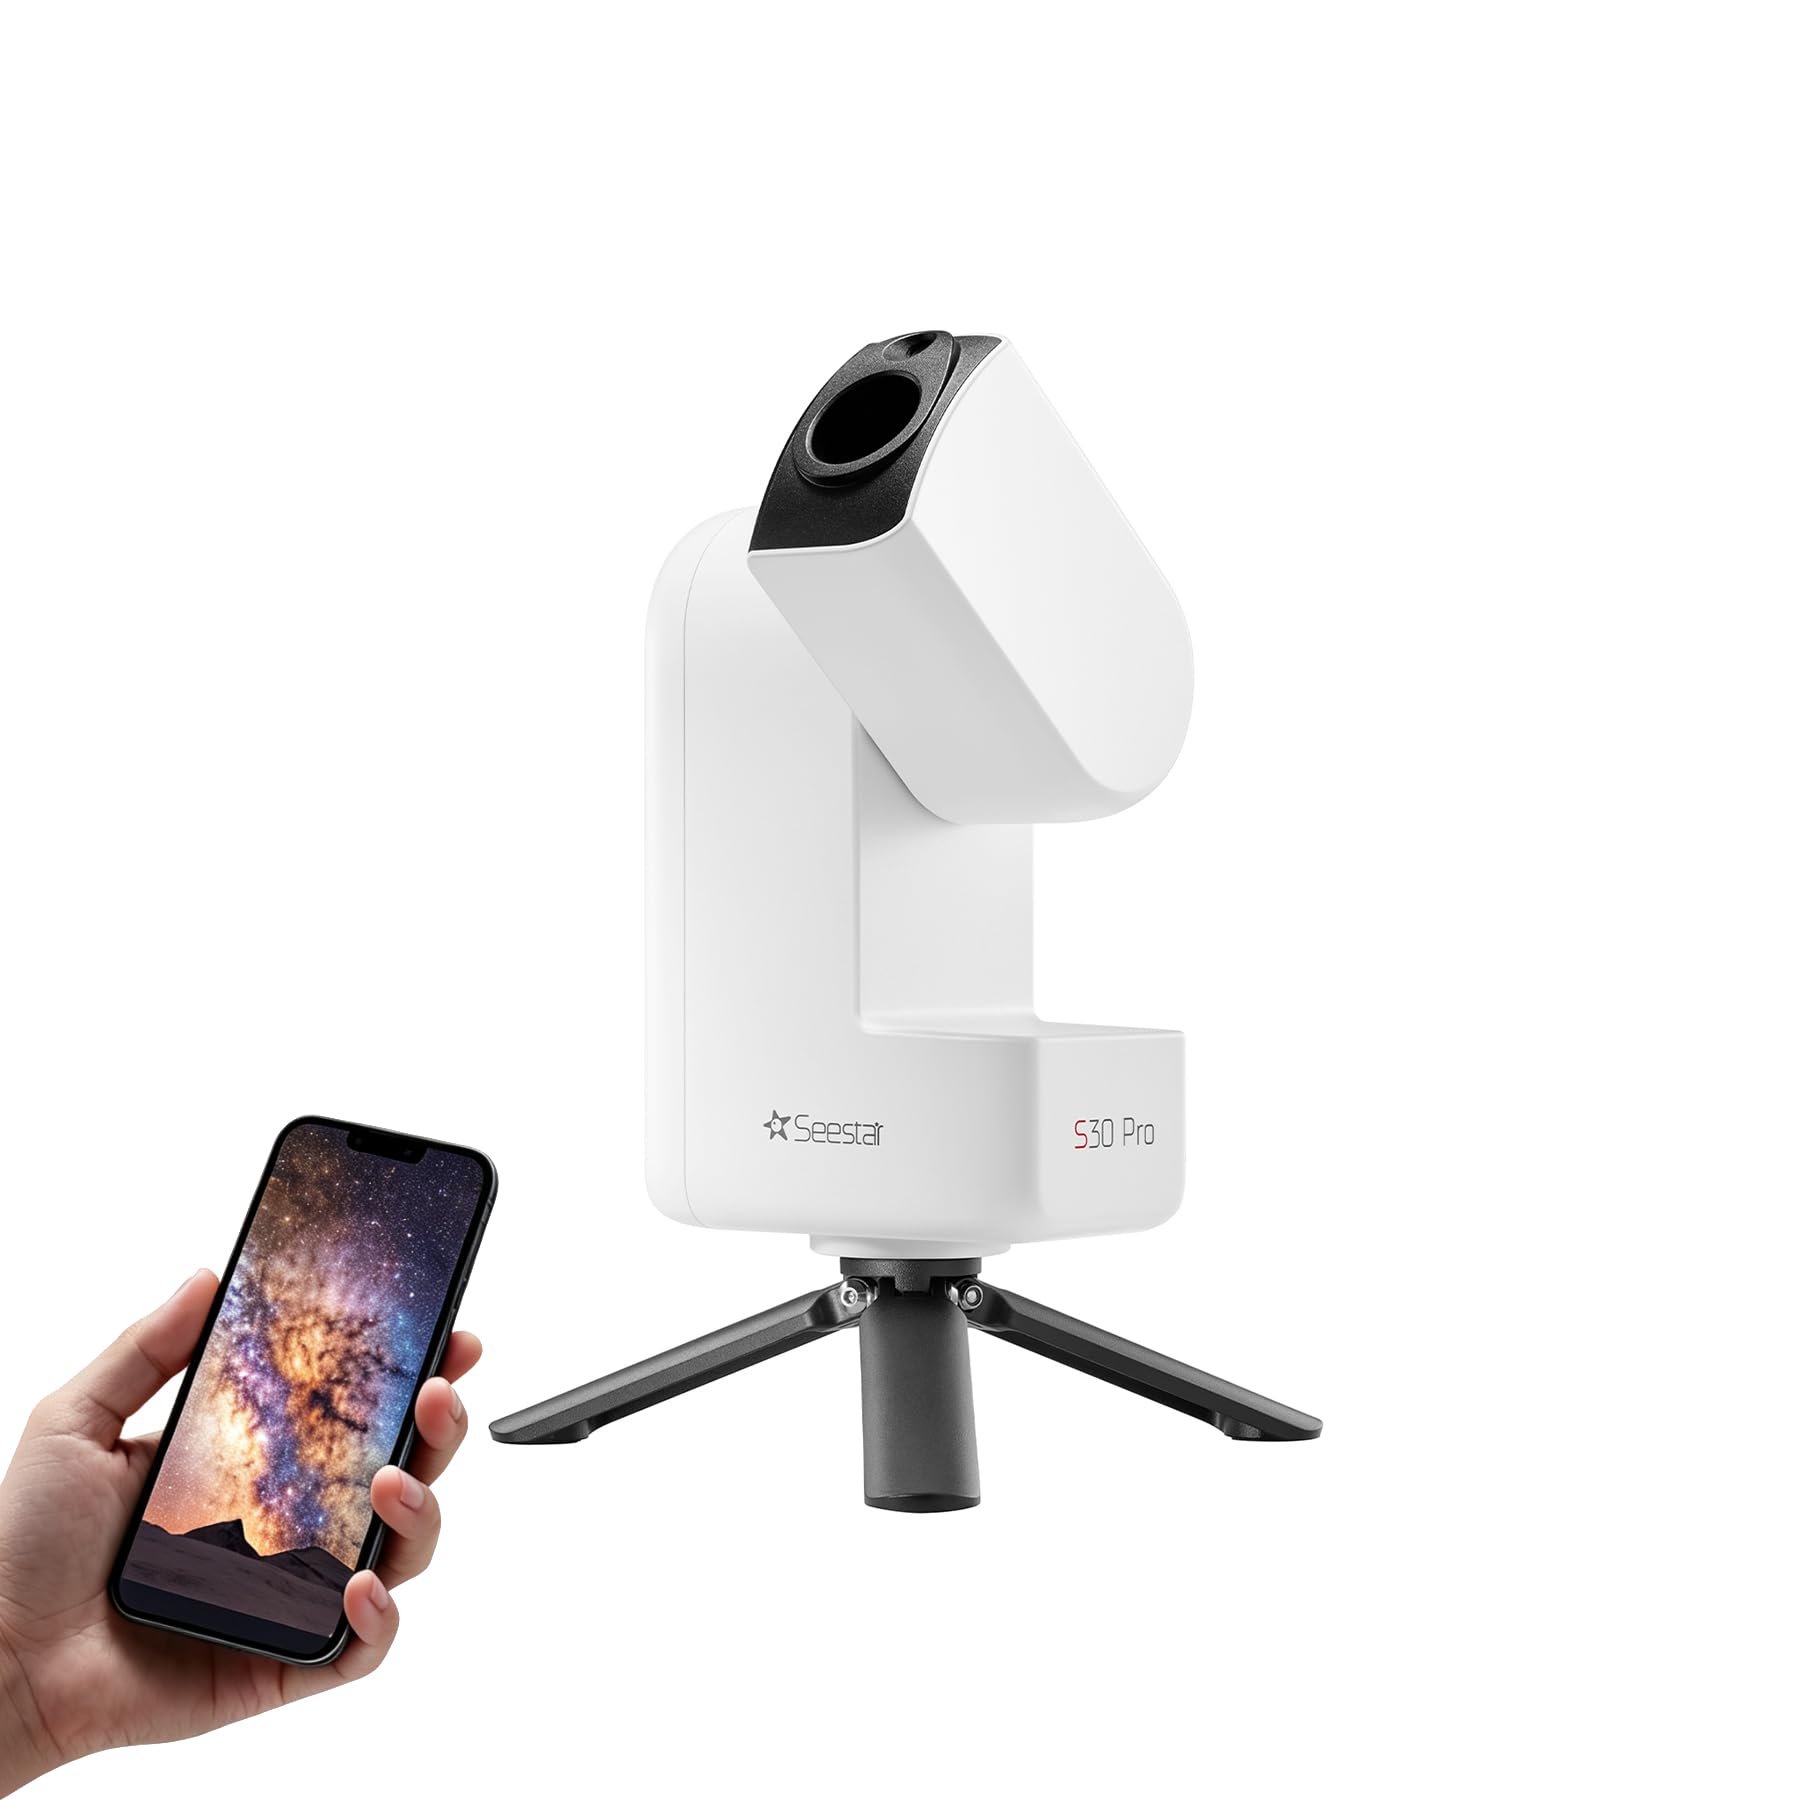
One tap is the whole pitch of the Seestar S30 Pro, and for most people shopping for a first astrophotography camera, that is the feature that matters. Power it on, connect the app, and the scope finds and tracks a target while stacking and processing the image on board. The dual-camera setup covers deep-sky objects and wide Milky Way scenes, and the 4.6-degree field is forgiving when you are still learning where things are.

We think it is the most complete first-night experience in this group. The 30mm aperture and 160mm focal length won't pull in the tiniest galaxies, but they frame nebulae, clusters, and the Moon generously. EQ mode is a real plus for longer sessions, and the built-in light-pollution filter helps in a suburb. For a beginner who wants images rather than a tinkering project, this is the one we point to first.

Alignment is the weak point. Compass calibration and pointing consistency can be fussy, so give yourself a few minutes and a clear view of the sky rather than setting up under a porch roof. That wide field is the trade-off: small planetary detail is not its job. If you want more reach later, you add a different scope, not a lens.

Pros

  • One-tap aiming, stacking, and processing
  • Dual 4K cameras for deep sky and wide fields
  • EQ mode and light-pollution filtering
  • Included tripod and carrying kit

Cons

  • App-only control; no physical controller
Our verdict

For the easiest path to deep-sky pictures on the first night, we point to the Seestar S30 Pro, with a phone app doing the aiming, stacking, and processing.
Check Latest Price
2

Best for Travel

Dwarf 3

85 /100
LBD Score Excellent

Key details

Mount
Alt-azimuth / EQ
Imaging
Dual 4K lenses
Aperture
35mm
Processing
Cloud-based app
View on Amazon

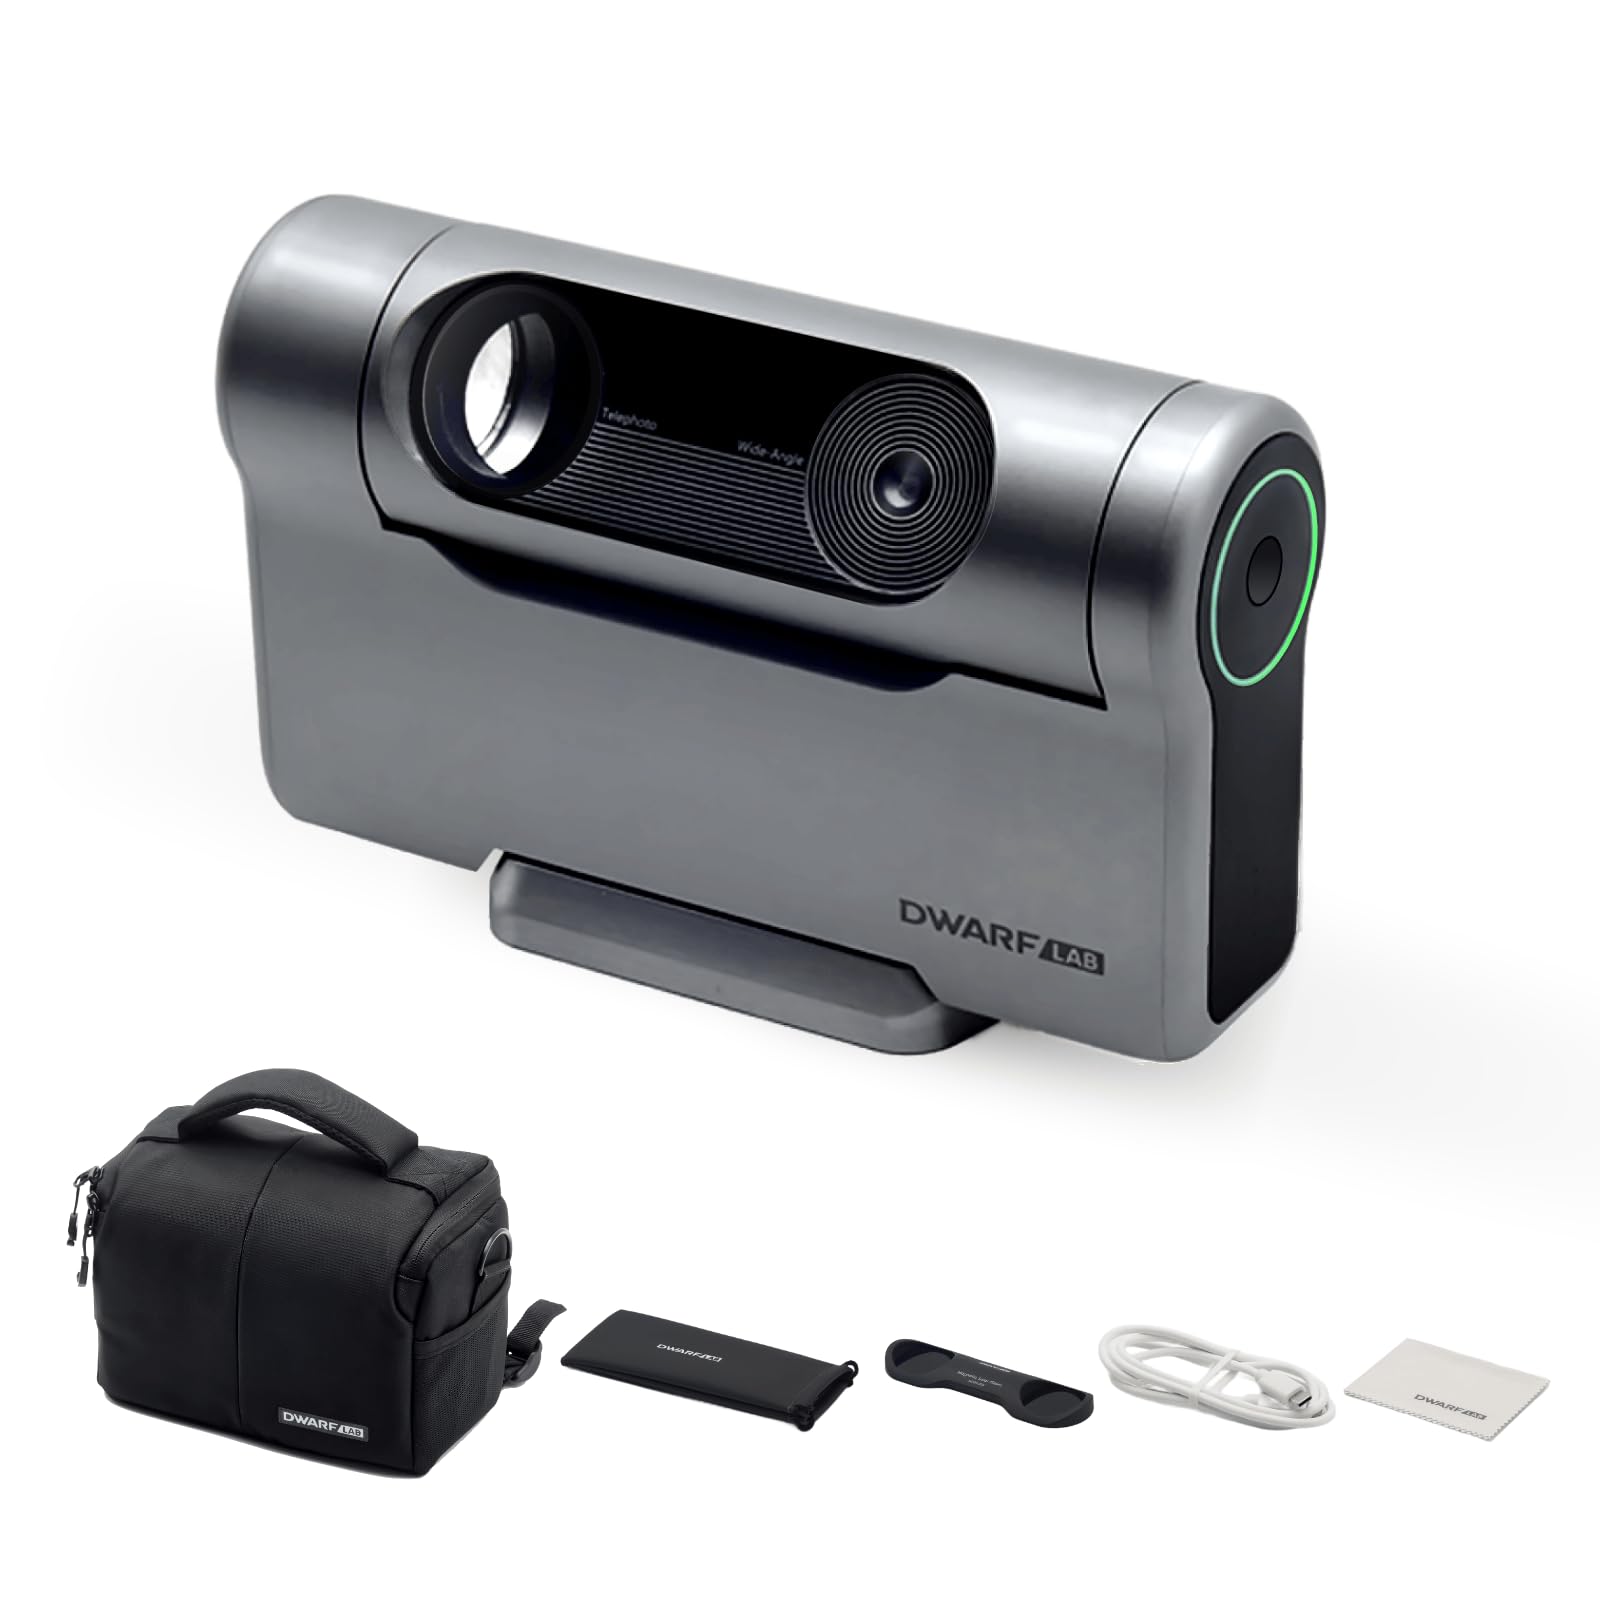
The Dwarf 3 is the one that fits in a backpack next to a water bottle, and that is not a small thing in a hobby where the best telescope is the one you actually take outside. It is an app-controlled smart scope with a dual-lens system, 4K imaging, automatic tracking, and both alt-azimuth and equatorial modes. It also costs less than our top pick, which makes the decision closer than the specifications suggest.

Its dual-lens design is the reason to consider it: a telephoto side for deep-sky objects and wildlife, a wide-angle side for the Milky Way and panoramas. The 35mm aperture gives it a little more light grasp than the Seestar's 30mm, though the difference is not dramatic in practice. What we appreciate is the flexibility. You can chase nebulae at night and hand it to a kid for a daytime nature shot, which is not something the dedicated cameras here can do.

What sells us is the travel case and the dual-use design. It is not the most polished point-and-shoot smart scope in this set, and the calibration routine takes more patience than the Seestar's, but it is the one we pack when the car is already full. If you split your time between the night sky and daytime subjects, it earns the space.

Pros

  • Dual lenses for deep sky and daytime
  • Packable, backpack-friendly build
  • Alt-azimuth and EQ tracking modes
  • Lower price than our top pick

Cons

  • App can be glitchy and drop connections
  • No interchangeable lenses
Our verdict

We like the Dwarf 3 for a smart telescope that travels easily and doubles as a daytime camera, as long as you can live with an app that needs patience.

Check Latest Price
3

Best Full-Frame

Canon EOS R8

91 /100
LBD Score Outstanding

Key details

Mount
Canon RF
Video
4K 60p
Sensor
24.2MP full-frame
Autofocus
Dual Pixel AF II
View on Amazon

The EOS R8 is the pick for someone who wants a conventional camera that can grow into deep-sky work without being locked into a smart telescope's built-in lens. It pairs a 24.2MP full-frame sensor with the Canon RF mount, Dual Pixel CMOS AF II, and 4K 60p video. That full-frame sensor is the reason to pay: it gives wide Milky Way scenes a clean, expansive look that the small smart scopes are not designed for.

For astrophotography, the R8 is a wide-field specialist. A fast RF wide-angle lens and a sturdy tripod get you started on constellations and nightscapes; for tracked deep-sky work you add a mount and learn to focus manually on a bright star. The autofocus is excellent for daylight, but it is not the feature you buy this for at night. The body-only package is also the beginning of the cost, not the end: lenses, a tripod, and a tracker all sit outside the box.

Battery life is the everyday annoyance, short enough that a long night needs spares, and the small body can feel cramped with big lenses. What we like is the long-term flexibility: the same camera handles travel, portraits, and a serious wide-field astro setup, and the RF mount gives you a clear upgrade path. If you are building a system rather than buying a one-off scope, that matters.

Pros

  • 24.2MP full-frame sensor
  • Dual Pixel AF II for daylight work
  • RF mount upgrade path
  • 4K 60p video

Cons

  • Body-only; lenses and tripod add cost
Our verdict

The EOS R8 is our choice for a full-frame system that handles wide-field nightscapes and grows with your lenses, tripod, and tracking mount.

Check Latest Price
4

Best DSLR to Learn On

Canon EOS Rebel T7

94 /100
LBD Score Outstanding

Key details

Mount
Canon EF / EF-S
Lenses
18-55mm and 75-300mm
Sensor
24.1MP APS-C
Autofocus
9-point AF
View on Amazon

The Rebel T7 double-zoom kit is the familiar, low-drama way into DSLR photography: a 24.1MP APS-C body, an 18-55mm standard zoom, and a 75-300mm telephoto for reach. For astrophotography, the useful half is the wide zoom and the manual controls. The long lens is better for the Moon than for faint nebulae, and that is fine because this kit is a learning platform, not a turnkey deep-sky rig.

The 18-55mm at its wide end is where we start: put the camera on a sturdy tripod, switch to manual focus, and use live view to focus on a bright star or the Moon. The 9-point autofocus is basic and slow in low light, so manual focus is the real workflow. The APS-C sensor is smaller than the R8's full-frame chip, which makes wide-field nightscapes a little tighter, but it is still enough to learn exposure and composition.

Build and controls are beginner-friendly, and the two-lens bundle means you do not have to buy a second lens to try the Moon. What we wish were better is the low-light autofocus; this is not a camera that feels eager in the dark. But as a first DSLR that also handles birthdays and vacations, it is easy to justify.

We think the T7 earns its place as the camera you buy when you are not ready to commit to a dedicated astronomy setup. It teaches the fundamentals that carry over to any rig: focus, exposure, tripod discipline, and patience. Just budget for a tracker or a faster wide lens before you expect deep-sky images.

Pros

  • Two-lens kit covers wide and telephoto
  • 24.1MP APS-C sensor
  • Beginner-friendly guided modes
  • Affordable DSLR kit

Cons

  • No memory card included
Our verdict

In our view, the Rebel T7 kit makes a sensible first DSLR for learning manual exposure and astrophotography without buying a dedicated astronomy rig.

Check Latest Price
5

Best Budget Planetary Camera

SVBONY SV305C

78 /100
LBD Score Very Good

Key details

Barrel
1.25 inch
Sensor
2.1MP IMX662 color
Connection
USB 2.0
Pixel Size
2.9µm
View on Amazon

The SV305C is a small-chip camera with a specific job: the Moon, the planets, and live EAA views through a telescope. Its 2.1MP IMX662 color sensor has 2.9µm pixels, a 1/2.8-inch back-illuminated design, and a 128MB buffer to keep frames moving over USB 2.0. The 1.25-inch barrel drops into a standard eyepiece holder, and the UV/IR cut glass is already in place.

We think it is the best value in this set for someone who already has a tracking telescope and wants color planetary images without spending smart-scope money. It is not a deep-sky camera in the usual sense: the sensor is small, the resolution is modest, and the long-exposure workflow is more limited than a cooled astronomy camera. But for Jupiter's bands, lunar craters, and sharing a live view on a laptop, it does the job.

SharpCap is the natural partner, and the one-key planetary and long-exposure modes make the software side less intimidating. The 1.25-inch barrel fits a standard eyepiece holder, and the camera's small body is easy to keep in the case with the rest of your eyepieces. We treat it as a specialist: when the Moon is up, it is the camera we reach for; when the target is a faint nebula, we reach for something else.

Pros

  • 2.1MP IMX662 color sensor
  • 2.9µm pixels suit planetary detail
  • 128MB buffer smooths USB 2.0 transfer
  • 1.25-inch barrel fits standard focusers

Cons

  • Small 2.1MP sensor limits wide fields
  • Needs a tracking telescope and laptop
Our verdict

We think the SV305C suits someone with a tracking telescope who wants a low-cost color camera for the Moon, planets, and live EAA, not a deep-sky imager.

Check Latest Price
6

Best Ultra-Budget Camera

FIBONAX Nova200

81 /100
LBD Score Excellent

Key details

Filter
Removable UV/IR cut
Sensor
2MP CMOS
Weight
3.88 oz
Resolution
1080p at 30fps
View on Amazon

The Nova200 is a 110g aluminum electronic eyepiece with a 2MP CMOS sensor, 1080p video at 30fps, and a removable UV/IR cut filter. It slides into a 1.25-inch focuser, connects by USB, and uses UVC so it can show a live view on Windows, macOS, or Linux without a special driver. The optional ASCOM driver gives Windows users a path into more advanced capture software.

This is a lunar and planetary camera, not a faint-nebula hunter. The small sensor and 1080p output are aimed at bright, high-contrast targets: crater edges, Jupiter's belts, Saturn's rings. The removable filter is a nice touch because it lets you choose whether to cut infrared, and the metal body feels more substantial than the price suggests. If you already own a telescope, it is a low-risk way to see what camera-assisted viewing is like.

We think it is the best ultra-budget first camera in this set for someone with a telescope and a computer. The UVC route is simple, and the ASCOM option means you are not locked out of better software later. The 110g body adds almost nothing to the focuser, so it is easy to treat as a second eyepiece rather than a project.

Pros

  • 1080p at 30fps
  • Removable UV/IR cut filter
  • UVC plug-and-play; optional ASCOM
  • Light 110g metal body

Cons

  • Deep-sky objects are out of reach
Our verdict

The Nova200 is the camera we suggest when the budget is tight and the target is the Moon or a bright planet, provided you already have a telescope.

Check Latest Price
7

Cheap First Camera

SVBONY SV105

83 /100
LBD Score Excellent

Key details

Sensor
1.25-inch color CMOS
Weight
10.2 oz
Connection
USB 2.0
Field Of View
1.5 degrees
View on Amazon

The SV105 is the low-cost experiment in this group: a 1.25-inch color CMOS camera that turns a small telescope into a live video feed. We think it is worth considering only if you already have a laptop, a modest scope, and patience for focus, not as a first deep-sky camera.

The camera uses a 1.25-inch barrel with an M28.5x0.6 thread, so it drops into a standard eyepiece holder and accepts screw-on filters. The 1.5-degree field is wide enough to frame the Moon, and the USB 2.0 connection keeps the setup simple. Dark-light compensation is there to help in low light, and SharpCap is the usual capture software.

Focus is the hurdle. The camera sits in the eyepiece holder, and some scopes run out of inward travel before the Moon snaps sharp; check your scope's back-focus and be ready to try an extension tube or focal reducer. Image quality is modest even when everything lines up, which is why we see it as a cheap way to try electronic viewing, not a long-term imaging camera.

Pros

  • Low-cost way to try electronic viewing
  • 1.25-inch barrel and M28.5 thread
  • 1.5-degree field frames the Moon
  • USB 2.0 plug-and-play

Cons

  • Windows-only; no Mac support
Our verdict

We suggest the SV105 only as a low-cost experiment for Windows users with a small telescope, and you should expect to work at focusing it.

Check Latest Price

What Eight Months of Clear Nights Taught Us

We started with spec sheets and customer reviews, then filtered hard. Anything that wouldn't work with a telescope someone already owned, or that required a laptop just to see a first image, went to the back of the line. Twelve units made the cut — app-controlled smart scopes, a mirrorless body, a DSLR kit, and several 1.25-inch eyepiece cameras — and we've been using them for eight months, whenever the weather cooperated.

Testing happened where these things actually live: a suburban back deck on weeknights, a city balcony under heavy light pollution, and a dark-sky campsite over a long weekend. I also handed the simplest setups to a friend who had never focused a telescope and timed her from unboxing to a saved image. That range was wide — a few minutes on one end, well over an hour on the other.

Focus and tracking got the closest look. We let each unit autofocus on a bright star, checked the result zoomed all the way in, and noted which ones drifted as the temperature dropped. Then we let them track for a full hour and hunted for trailing at the corners of the frame. Every app and driver was installed by us, on both a phone and an older laptop, with crashes and dropped connections written down.

For image quality we shot the same three targets wherever the season allowed — the moon, a bright cluster, and one galaxy — and compared noise, star color, and whether the moon's bright edge held detail or blew out. Value came last: we tallied the extras each setup quietly demanded, then ran each one at 1 a.m. with cold hands and a red headlamp, because menus that make sense at a desk rarely make sense at the eyepiece.

How to Choose a Camera for Astrophotography

Start with the target, then the hardware

The Moon and planets are bright, small, and forgiving of short exposures. A dedicated planetary camera like the SV305C or Nova200, paired with a tracking telescope, is the efficient route: small sensors and fast video capture more detail than a wide-field rig. Nebulae and galaxies are faint and often large, so they reward a wider field, better tracking, and more processing. Smart telescopes such as the Seestar S30 Pro and Dwarf 3 split the difference by building the camera, optics, mount, and stacking software into one package. A DSLR or mirrorless body like the Rebel T7 or EOS R8 is the most flexible choice, but only if you are willing to assemble the rest of the system.

Pick the target you care about most before you pick the camera; a planetary camera and a deep-sky camera are not interchangeable, and a smart telescope is a different kind of purchase from a body.

Tracking matters more than resolution

Astrophotography is a test of patience, and the mount is what buys you time. A smart telescope handles GoTo alignment and tracking for you; the Seestar's EQ mode and the Dwarf's AZ/EQ modes are there for longer sessions. A conventional camera needs a tracker or a GoTo mount before deep-sky exposures become practical, and a dedicated astronomy camera needs a telescope that can follow the sky. If you do not already own a tracking mount, a smart telescope is the lower-friction route. If you do, a camera body or a small planetary camera can make better use of it.

Budget for the mount before you budget for the sensor; an untracked camera will still capture the Moon, but faint nebulae will be a struggle.

The software is half the camera

Every camera here depends on software, and the experience differs sharply. Smart telescopes run through a phone or tablet app that aims, stacks, and processes; that is why they are so approachable, and also why app stability matters as much as optics. Dedicated astronomy cameras usually mean a laptop, with SharpCap or ASCOM on Windows and a more technical capture workflow. DSLR and mirrorless bodies can shoot to a memory card, but live-view focusing and interval shooting are easier with a computer. Before you buy, check the app or software against the computer or phone you actually own.

If you use a Mac, confirm support before choosing a Windows-first astronomy camera; the Nova200's UVC connection is the simplest cross-platform option in this group.

Match the optics to the sky you have

Field of view is the specification that decides what fits in the frame. The Seestar's 4.6-degree field is generous enough for the Moon, larger nebulae, and wide star fields; the Dwarf's 35mm aperture gives it a little more light grasp for deep-sky work. A full-frame body like the EOS R8 is at its best with a wide lens for the Milky Way, while a small planetary camera like the SV305C trades field for pixel scale on Jupiter or the Moon. Light pollution also changes the calculation: a built-in filter helps, but it does not replace dark skies or good processing.

Choose a wide field for nebulae and the Milky Way, a small sensor for planets, and do not expect one camera to excel at both.

Price the whole kit, not just the box

The camera is rarely the whole purchase. The EOS R8 is body-only, so lenses, a tripod, and a tracker sit outside the box; the Rebel T7 kit includes two lenses but still needs a memory card and a stable tripod. Dedicated astronomy cameras need a telescope and a laptop. Smart telescopes include the mount and tripod, which is a large part of why they cost more than a bare camera. Add up the complete first-night kit before you decide which route is affordable.

If the total is tight, a smart telescope or a two-lens DSLR kit usually gets you imaging sooner than a body-only camera with no tracking.

Frequently Asked Questions

Final Verdict

For most people, the Seestar S30 Pro is the camera we recommend first. It is the most complete first-night experience in this group: the dual 4K cameras, 4.6-degree field, EQ mode, and one-tap processing get you from setup to a finished deep-sky image without a laptop or a separate mount.

Choose the Dwarf 3 if travel and daytime use matter more than the smoothest app, the EOS R8 if you want a full-frame system for wide-field nightscapes, or the Rebel T7 if you want a familiar DSLR to learn on. The dedicated astronomy cameras make sense once you already own a telescope and want a specific planetary or EAA tool.